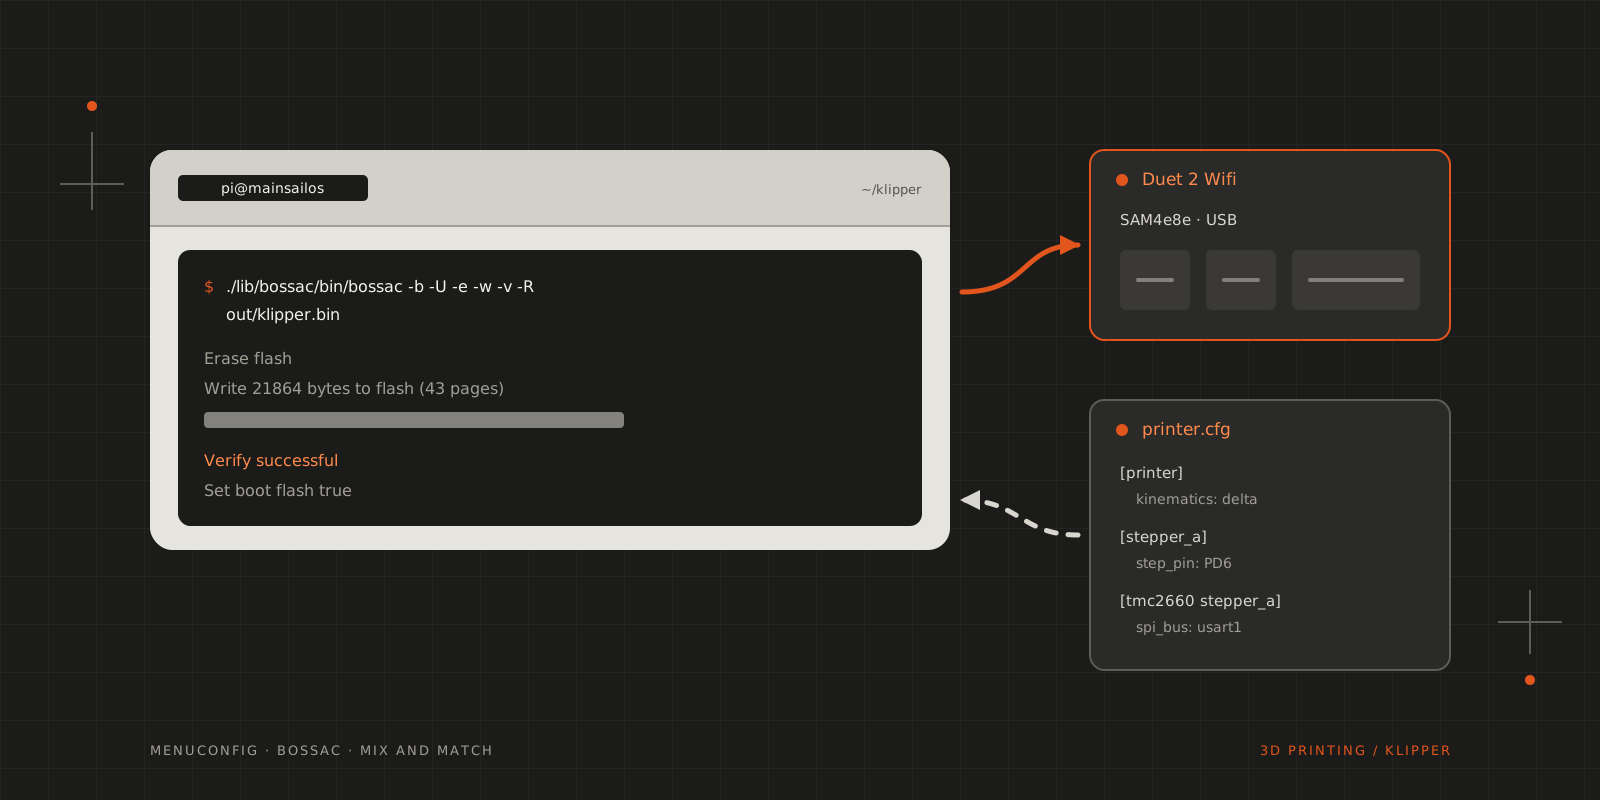
While Duet Web Control is nice and RepRapFirmware is a solid workhorse with a proven track record, I’ve really wanted to get on the Klipper bandwagon!
I wanted to see what the Klipper hype is all about and what it can do for me in print quality and ease-of-life aspects.
First of all: Klipper is an alternative firmware for your 3D printer which offloads the heavy lifting (calculations) to an external provider (Raspberry Pi, laptop, desktop, …). This allows for a whole lot, actually! Imagine that your printer is still rocking that old and faithful 8-bit microcontroller, you’re still stuck with early versions of Marlin because of space constraints, and you’re missing out on all the fun and new features. No more! Klipper to the rescue!
Since I’ve got a solid board and the wiring already done, I didn’t really want to tinker with the hardware setup, so I went on to flash Klipper onto the Duet, and this is how it went. (This isn’t for the faint of heart!)
Building the firmware
The first real hurdle to cross was flashing Klipper onto the Duet board. While documentation is available, it’s all over the place… So, to make things easy for next time, here’s how the make menuconfig command should be set up:
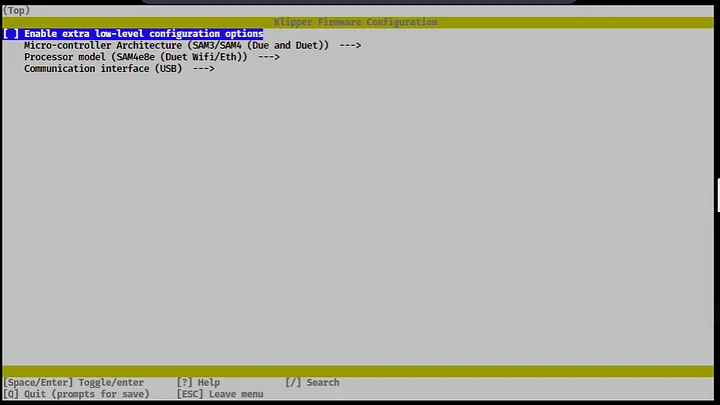
This was the easy part; now you can build the firmware.
Flashing the Duet
The next, harder part (if you’re not a regular Duet 2 flasher) was to figure out how to flash the Duet 2 board with the new firmware. This is where the Duet wiki article about flashing comes in handy!
You can follow the preparation steps to enter “flash mode” (and totally erase the previous firmware on entering said state).
At this point, you’ll have to deviate from all the documentation present and go for another one, which will tell you to use bossac to flash the printer instead of the nifty little flashing tool provided by Klipper (it also uses bossac, but with the wrong flags for our case).
Take note of the unique port name provided by this command, as you’ll need to replace the /dev/ttyACM0 part with its result below:
$ls /dev/serial/by-id/*So, command line it is:
$./lib/bossac/bin/bossac --port=/dev/ttyACM0 -b -U -e -w -v -R out/klipper.bin1Erase flash2Done in 4.079 seconds3Write 21864 bytes to flash (43 pages)4[==============================] 100% (43/43 pages)5Done in 0.335 seconds6Verify 21864 bytes of flash7[==============================] 100% (43/43 pages)8Verify successful9Done in 0.327 seconds10Set boot flash trueIf you see something like this, you’re golden! At this point, we have open communications between the printer and the Raspberry Pi (in my case at least, YMMV).
Configuring the printer
This preparation part was arguably the easier one; the next one can be a bit… Google-heavy 😃 We need to configure our printer! Here are a few resources to do just that:
As you’ve probably guessed, we’re going to mix and match parts of config files! Here are my results. The first one is where I started:
1[mcu]2serial: /dev/serial/by-id/usb-Klipper_sam4e8e_00313953325753543039303330303630-if0034[printer]5kinematics: delta6max_velocity: 5007max_accel: 20008max_z_velocity: 2009minimum_z_position: 010delta_radius: 1301112[stepper_a]13step_pin: PD614dir_pin: !PD1115enable_pin: !PC616microsteps: 1617rotation_distance: 3218endstop_pin: ^PC1419position_endstop: 31620arm_length: 288.1421homing_speed: 6022second_homing_speed: 52324[tmc2660 stepper_a]25cs_pin: PD1426spi_bus: usart127run_current: 1.00028sense_resistor: 0.0512930[stepper_b]31step_pin: PD732dir_pin: !PD1233enable_pin: !PC634microsteps: 1635rotation_distance: 3236endstop_pin: ^PA23738[tmc2660 stepper_b]39cs_pin: PC940spi_bus: usart141run_current: 1.00042sense_resistor: 0.0514344[stepper_c]45step_pin: PD846dir_pin: !PD1347enable_pin: !PC648microsteps: 1649rotation_distance: 3250endstop_pin: ^PD295152[tmc2660 stepper_c]53cs_pin: PC1054spi_bus: usart155run_current: 1.00056sense_resistor: 0.0515758[extruder]59step_pin: PD560dir_pin: PA161enable_pin: !PC662microsteps: 1663rotation_distance: 964nozzle_diameter: 0.40065filament_diameter: 1.75066heater_pin: !PA2067sensor_type: EPCOS 100K B57560G104F68sensor_pin: PC1569control: pid70pid_Kp: 14.52971pid_Ki: 0.55772pid_Kd: 94.80273min_extrude_temp: 18074min_temp: 075max_temp: 2607677[tmc2660 extruder]78cs_pin: PC1779spi_bus: usart180run_current: 1.00081sense_resistor: 0.0518283[heater_bed]84heater_pin: !PA1985sensor_type: EPCOS 100K B57560G104F86sensor_pin: PC1387control: pid88pid_Kp: 325.1089pid_Ki: 63.3590pid_Kd: 417.1091min_temp: 092max_temp: 1509394[fan]95pin: PC239697[probe]98pin: PC199z_offset: -0.1100speed: 20101samples: 2102103[delta_calibrate]104radius: 120105106[gcode_arcs]107resolution: 1.0108109[filament_switch_sensor Filament]110pause_on_runout: True111switch_pin: !PD10112113[virtual_sdcard]114path: ~/gcode_files115116[display_status]117118[pause_resume]119120[bed_mesh]121mesh_radius: 120And this is the one I’m running now:
1# This file contains common pin mappings for Duet2 Eth/Wifi boards. To2# use this config, the firmware should be compiled for the SAM4E8E.34# See docs/Config_Reference.md for a description of parameters.56[mcu rpi]7serial: /tmp/klipper_host_mcu89[adxl345]10cs_pin: rpi:None1112[resonance_tester]13accel_chip: adxl34514probe_points:15 0,0,20 # an example1617[mcu]18serial: /dev/serial/by-id/usb-Klipper_sam4e8e_00313953325753543039303330303630-if001920[printer]21kinematics: delta22max_velocity: 50023max_accel: 200024max_z_velocity: 20025minimum_z_position: -526#delta_radius: 1302728[stepper_a]29step_pin: PD630dir_pin: !PD1131enable_pin: !PC632microsteps: 1633rotation_distance: 3234endstop_pin: ^PC1435#position_endstop: 31636#arm_length: 288.1437homing_speed: 6038second_homing_speed: 53940[tmc2660 stepper_a]41cs_pin: PD1442spi_bus: usart143run_current: 1.00044sense_resistor: 0.0514546[stepper_b]47step_pin: PD748dir_pin: !PD1249enable_pin: !PC650microsteps: 1651rotation_distance: 3252endstop_pin: ^PA25354[tmc2660 stepper_b]55cs_pin: PC956spi_bus: usart157run_current: 1.00058sense_resistor: 0.0515960[stepper_c]61step_pin: PD862dir_pin: !PD1363enable_pin: !PC664microsteps: 1665rotation_distance: 3266endstop_pin: ^PD296768[tmc2660 stepper_c]69cs_pin: PC1070spi_bus: usart171run_current: 1.00072sense_resistor: 0.0517374[extruder]75step_pin: PD576dir_pin: PA177enable_pin: !PC678microsteps: 1679rotation_distance: 7.61880nozzle_diameter: 0.40081filament_diameter: 1.75082heater_pin: !PA2083sensor_type: EPCOS 100K B57560G104F84sensor_pin: PC1585#control: pid86#pid_Kp: 14.52987#pid_Ki: 0.55788#pid_Kd: 94.80289min_extrude_temp: 18090min_temp: 091max_temp: 26092max_extrude_cross_section: 5093pressure_advance: 0.0829495[tmc2660 extruder]96cs_pin: PC1797spi_bus: usart198run_current: 1.00099sense_resistor: 0.051100101102#[extruder1]103#step_pin: PD4104#dir_pin: PD9105#enable_pin: !PC6106#heater_pin: !PA16107#sensor_pin: PC12108#...109#[tmc2660 extruder1]110#cs_pin: PC25111#spi_bus: usart1112#sense_resistor: 0.051113#...114115[heater_bed]116heater_pin: !PA19117sensor_type: EPCOS 100K B57560G104F118sensor_pin: PC13119#control: pid120#pid_Kp: 325.10121#pid_Ki: 63.35122#pid_Kd: 417.10123min_temp: 0124max_temp: 150125126[fan]127pin: PC23 # FAN0128129#[heater_fan nozzle_cooling_fan]130#pin: PC26 # FAN1131132#[heater_fan board_cooling_fan]133#pin: PA0 # FAN2134135[probe]136pin: PC1137z_offset: -0.340138speed: 20139samples: 2140samples_tolerance_retries: 2141142[delta_calibrate]143radius: 120144145[gcode_arcs]146resolution: 1.0147148[filament_switch_sensor Filament]149pause_on_runout: false #pause handled by macro150runout_gcode:151 M600 #calls a macro with the name M600 (so it can be called by slicers too)152switch_pin: !PD10153154[virtual_sdcard]155path: ~/gcode_files156157[display_status]158159[pause_resume]160161[bed_mesh]162mesh_radius: 120163164# This macro should be called at the 'start g-code' part165# of your slicer and you would put all the start g-code here166# instead so that you don't have to re-slice everytime you167# have to edit the commands168[gcode_macro START_PRINT]169gcode:170 SET_GCODE_OFFSET Z=0.0171 SET_GCODE_OFFSET Z_ADJUST=-0.1 MOVE=1 # PETG for 260mm plate172 #SET_GCODE_OFFSET Z_ADJUST=-0.340 MOVE=1 # PLA for 260mm plate173 #SET_GCODE_OFFSET Z_ADJUST=-0.560 MOVE=1 # PLA for 265mm plate174175# This macro should be called at the 'end g-code' part176# of your slicer and like the macro above, you would177# also put all of your end g-code here for the same reason as above178[gcode_macro END_PRINT]179gcode:180 G91181 G1 E-7 F2100182 SET_GCODE_OFFSET Z_ADJUST=0 # resets the z-offset (otherwise, )183184# Pause print macro185[gcode_macro PAUSE]186rename_existing: BASE_PAUSE187default_parameter_X: 0 #edit to your park position188default_parameter_Y: 100 #edit to your park position189default_parameter_Z: 30 #edit to your park position190default_parameter_E: 5 #edit to your retract length191gcode:192 SAVE_GCODE_STATE NAME=PAUSE_state193 BASE_PAUSE194 G91195 G1 E-{E} F2100196 G1 Z{Z}197 G90198 G1 X{X} Y{Y} F6000199200# Resume print macro201[gcode_macro RESUME]202rename_existing: BASE_RESUME203default_parameter_E: 5 #edit to your retract length204gcode:205 G91206 G1 E{E} F2100207 G90208 RESTORE_GCODE_STATE NAME=PAUSE_state MOVE=1209 BASE_RESUME210211# Cancel print macro212[gcode_macro CANCEL_PRINT]213rename_existing: BASE_CANCEL_PRINT214gcode:215 TURN_OFF_HEATERS216 CLEAR_PAUSE217 SDCARD_RESET_FILE218 BASE_CANCEL_PRINT219 G28220 END_PRINT221222[gcode_macro SET_Z]223gcode:224 G28225 G1 X0 Y0 Z10 F5000226 PROBE227 G1 X0 Y0 Z10228 G1 X0 Y0 Z0229230[gcode_macro UNLOAD]231gcode:232 M83233 G0 E-50 F1800234 G0 E-50 F1800235 G0 E-50 F1800236 G0 E-50 F1800237 G0 E-50 F1800238 G0 E-50 F1800239 G0 E-50 F1800240 G0 E-50 F1800241 G0 E-50 F1800242 G0 E-50 F1800243 G0 E-50 F1800244 G0 E-50 F1800245 G0 E-50 F1800246247[gcode_macro LOAD]248gcode:249 M83250 G0 E50 F1800251 G0 E50 F1800252 G0 E50 F1800253 G0 E50 F1800254 G0 E50 F1800255 G0 E50 F1800256 G0 E50 F1800257 G0 E50 F1800258 G0 E50 F1800259 G0 E50 F1800260 G0 E50 F1800261 G0 E50 F1800262263[gcode_macro PARK_MACRO]264default_parameter_X: 0265default_parameter_Y: 100266default_parameter_Z: 30267gcode:268 M117 PARKING..269 G91270 G1 E-3.14 F1500271 G1 Z{Z}272 G90273 G1 X{X} Y{Y} F3000274 275[gcode_macro M600]276gcode:277 PAUSE_MACRO278 UNLOAD279280[gcode_macro PAUSE_MACRO]281gcode:282 PAUSE283 PARK_MACRO284 285[gcode_macro PURGE]286gcode:287 M117 PURGING..288 G91289 G1 E45.0 F250290 G1 E45.0 F250291 G1 E-5 F1800292 G90Compared to the first version, a few things moved or got added:
delta_radius,position_endstop,arm_lengthand the PID values are commented out, becauseDELTA_CALIBRATE,PID_CALIBRATEandSAVE_CONFIGstore the calibrated values in the auto-generated block at the end ofprinter.cfg.- The Raspberry Pi is a second MCU (
[mcu rpi]), so an ADXL345 accelerometer on it can drive[resonance_tester]. - The extruder’s
rotation_distanceis calibrated, andpressure_advanceis set. - The macros:
START_PRINTandEND_PRINTkeep the start and end G-code out of the slicer, and filament runout goes through anM600macro that pauses, parks and unloads.